How to change Alexa’s Name and the Name Alexa calls You

Amazon Alexa is a popular name among virtual assistants. It comes with many attractive features. You can use this smart assistant for a wide range of tasks. For example, through an Echo speaker or any other Alexa-equipped device, you can get many advantages, including dimming lights, monitoring temperature, monitoring smart locks, listening to music, and more.
If you have an Alexa device, then you might have experienced a scenario when you get a response from Alexa without asking for any help. There are some certain reasons why it happens. Alexa may respond without asking for help if someone has a name like Alexa or something close to it. You may have placed your Alexa device next to your TV, and the sound coming from the TV includes words related to Alexa or something like this.
But here is a solution to this problem. You can consider a different name as Alexa wake word and also the name that Alexa calls you. Here is a step-by-step guide to doing so.
Steps to change Alexa’s wake word
The directions are based on the Echo device that currently works with “Alexa” as a wake word.
- To change Alexa’s wake word, first, you have to access the Amazon Alexa app.
- Look for the Devices tab from the bottom section and tap on it.
- From the top, go down and choose All Devices.
- Locate your Echo device from the list.
- Now go down and pick the Wake Word option.
- Decide the wake word for your Alexa device.
Note that you only will be able to use the new Alexa’s name on this particular Echo device. You can also change Alexa’s name for any other Echo device by hitting the back button and choosing the Echo device through the same steps mentioned above.
Steps to change Alexa’s name through a voice command
The directions are based on the Echo device that currently works with “Alexa” as a wake word.
- To change the Alexa name using your voice command, you have to say, “Alexa, can you change your name?” Instead, you can also say: “Alexa, can you change your wake word?”
- As you command Alexa through these voice commands, Alexa will reply and say that “I can help you change the wake word for this device. Should we do that now?” You have to respond “Yes” to this Alexa’s question.
- Now Alexa will ask you about the device, for example, Amazon, Computer, or Echo. You have to choose one device.
- Here, Alexa will allow you to say the new name.
- According to Alexa’s answers, you can utilize the new wake word.
How to change the name that Alexa calls you
Now you know how to change Alexa’s name. But do you know that you can also change the name that Alexa calls you? Here are the required steps to do that.
- First, you have to open the Alexa app.
- Look for the Communication section from the lower part of the screen.
- Tap on the person’s icon that shows your profile from the top right corner.
- From the next page, look below your name and click My Communication Settings.
- Click on the Edit button located in the top right corner.
- Change the name based on what you like to have.
- Hit on the Save button from the top right corner to finalize the change.
- You can be sure about your new name by asking Alexa.
Note that if you change the user’s name on Alexa, it will affect the other features. Your changed name will also show with your public profile. So, you should choose an ideal name for yourself.
Harry Williams is an inventive person who has been doing intensive research in particular topics and writing blogs and articles for Wire IT Solutions on Norton Products, Webroot Products, McAfee Products, Microsoft Office and many other related topics. He is a very knowledgeable person with lots of experience.To get in touch with the internet security service provider, just dial 844-313-0904.
SOURCE : How to change Alexa Name
Samsung Mocked the iPhone 12 Pro Max With Its Zoom and Camera Feature Reveal
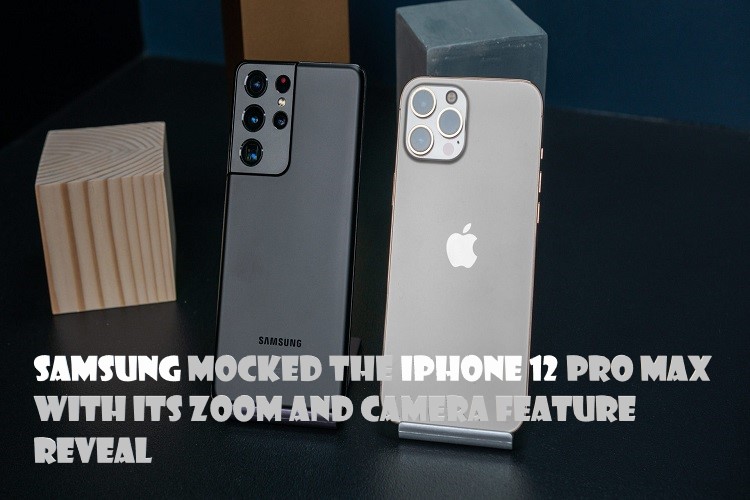
Samsung and Apple are strong contenders in the U.S. market. The clash between Samsung and Apple is quite famous. Both companies often troll each other to bump into each other. While Samsung has earlier trolled Apple for its big notch, Apple has also made fun of Samsung for its slow Android phones and unsafe app stores. The competition is on the next level as Samsung is trolling Apple for its iPhone 12 Pro Max and doing this with a full-fledged marketing strategy to kill Apple’s reputation.
The South Korean company has now released two new videos to make fun of Apple. It makes fun of the iPhone 12 Pro Max. According to Samsung mobile, the first video shows Samsung galaxy S21 ultra compared to iPhone 12 Pro Max.
iPhone fails in zoom feature as claimed by Samsung
While the iPhone 12 Pro Max camera reaches the optical zoom 12x, the zoom of the Galaxy S21 Ultra can take a clear picture of the moon directly. Samsung’s camera ad shows the power of the company’s current flagship. Samsung’s phone’s camera has a variety of features that include stabilization technology that helps the phone take photos at the zoom level. In such a situation, it is quite clear that Apple cannot beat this Samsung technology. The loyal customer base maybe doesn’t get bothered by this comparison, but the new users who need a superb camera phone are surely going to consider this and maybe change their decision.
The second video of the cheese sandwich
In the second video, Samsung shows a cheese sandwich. This photo was created with the help of Galaxy S21 Ultra and Samsung 12 Pro Max and then compared to the quality of both. While the picture taken from Samsung’s phone looks quite clear and crisp, the picture taken from the iPhone 12 Pro Max is not showing the details when zoomed in and looks blurry. Food lovers and food bloggers who always click and elaborate about the lovely food are surely going to see this video and decide who is the best as they don’t want low picture quality for their superb blogs and social media.
Samsung has launched both its ads under its new slogan, which is “Your phone upgrade shouldn’t be a downgrade.” That is, if you’re upgrading your phone, it should have many different features. It’s not that if you take a new phone, its features will downgrade your phone.
Samsung and Apple have a big name in the smartphone market in the U.S.
According to Counterpoint Research, Apple’s U.S. smartphone market has fallen 65 percent. That is, it’s 55 percent lower than the previous quarter. At the same time, Samsung’s market share has reached 16 to 27 percent. The two companies are now trying their best to compete with each other with the help of advertisements.
The next big question is what will be the next move on marketing and advertising front of Apple as they also know aggressive advertising strategies are the new cool in which you directly compare your product with the competing one and also use the competitor’s name for the purpose, Samsung has taken a step and showed the market clearly that why he is gaining and having an upward growth in the market, while Apple is losing the market share. The smartphone lovers will surely be going to take this competition seriously for their future purchase as no one want a downgrade for the price of an upgrade. Let’s hope Apple is planning something superb for their ardent fanbase.
Harry Williams is an inventive person who has been doing intensive research in particular topics and writing blogs and articles for Wire IT Solutions on Norton Products, Webroot Products, McAfee Products, Microsoft Office and many other related topics. He is a very knowledgeable person with lots of experience.To get in touch with the internet security service provider, just dial 8443130904.
A Guide to Change or Reset the Dropbox Password

Dropbox is one of the most popular and commonly used file hosting services worldwide, operated by an American company. The service enables the users to keep a backup of all of their essential files and documents on the cloud. Using the Dropbox file hosting service, one can also keep identical copies of their files up to date on their multiple devices. The company started this file hosting service in the year 2007. And since then, millions of people have started using this service on various devices. Accessing the Dropbox file hosting service is pretty straightforward. One can use this service on devices including Windows, Mac, and Linux computers, along with Android and iOS devices. As per the estimated record, there are over 14.6 million paying customers of this service. And you can also use the free version of Dropbox. Because of its amazing features, people often use Dropbox to save their important documents.
However, there are various other cloud storage services also. And Dropbox is considered as best among all others. In order to access this service, you will need to create an account. Creating a Dropbox account also follows a much straightforward process. But, what if you want to change or reset the password of your Dropbox account? Do you know how you can change your Dropbox password? If you don’t know the procedure for this, then I suggest that you should go through this complete article. Here, we are going to show you the process that you will need to follow to change or reset your Dropbox password. So, to get to the method, please consider reading this entire post.
The Procedure to Change or Reset the Dropbox Password
Dropbox provides various great features to its users to enhance their experience. It makes it much convenient and easy for you to manage your documents and files on more than one device. The service brings all of your files in one central place by creating a special folder on your computer system or mobile devices. But it is also true that the service has also faced some criticism regarding the issues, including security breaches and privacy concerns. And that is why, to protect their data, some users might want to change their Dropbox password. Or there may be other reasons also due to which you are going to change or reset your Dropbox password. Whatever the reason might be, by following the procedures mentioned here, you will be able to change or reset your Dropbox password much quickly. For this, you will have to visit the Dropbox website on your computer. So, let’s get to the methods now.
The Steps for Changing the Dropbox Password
Follow the steps to get started with the process of changing your Dropbox password:
- To change your Dropbox password, first of all, turn on your computer system and then navigate to any trusted web browser.
- After opening the web browser, you will have to visit the Dropbox website.
- And after landing on the homepage of the website, proceed further by logging into your Dropbox account by using your email address and password. Here, you can also choose to sign in using your Google or Apple account.
- And after you are logged in to your account, you will reach the main Dropbox interface. Here, you will have to click on the profile picture that you can see located at the top-right corner of your screen.
- And after clicking on the profile picture, you will be provided with a few options. Here, you will have to choose the option of “Settings.”
- And after you reach the Dropbox settings page, click on the “Security” tab given on the top of the screen.
- On the next screen, navigate to the option of “Change Password.”
- And here, you will be asked to enter your current password. After entering your current Dropbox password, type in your new password in the space provided to you.
- Enter your new password one more time. And at last, complete the procedure by clicking on the option of “Change Password.” And that’s all. Now your Dropbox password will be changed.
The Steps for Resetting Your Dropbox Password
You can follow this method if you don’t remember your current Dropbox password. Here are the steps that you will need to follow to reset your Dropbox password:
- To reset your Dropbox password, the first step that you will need to follow is to visit the Dropbox login landing page.
- And after reaching the website, go to the “Forgot Your Password” link.
- And now, you will be asked to enter your email that is associated with your Dropbox account.
- After entering the email, click on the “Submit” button.
- And after this, you will have to go to your mailbox, where you will have to find the email containing the “Reset Your Dropbox Password” link. Open the email and then tap or click on the link to proceed further.
- After you get to the next screen, select the “Reset Password” button.
- Enter the new password two times.
- And finally, click on the “Submit” button, after which your Dropbox password will be updated. And that’s it.
So, this is how any Dropbox user can change or reset their password. Follow the instructions mentioned above now, and to read more informative articles like this, please visit our website.
Harry Williams is an inventive person who has been doing intensive research in particular topics and writing blogs and articles for Wire IT Solutions on Norton Products, Webroot Products, McAfee Products, Microsoft Office and many other related topics. He is a very knowledgeable person with lots of experience.To get in touch with the internet security service provider, just dial 844-313-0904.
SOURCE : Dropbox Password
How to Recover Locked Google Account
People that use the internet are well aware of Google and its services. With the help of a Google account, you can access Google Drive, Hangout, Gmail, Google Photos, and many more services associated with Google. However, you have to remember your Google email and password to access the Google account and its services.
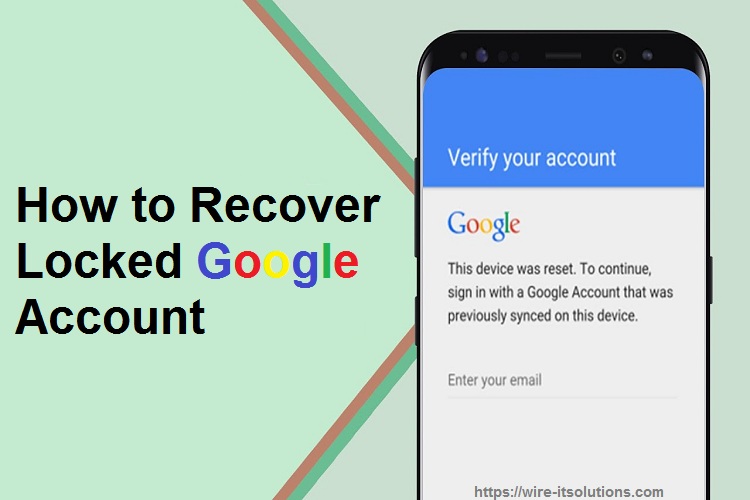
Sometimes when you enter a wrong password repeatedly while signing up the Google account, it gets locked, and then it turns out to be difficult to open the account. You won’t be able to access your Google Photos, documents, and other important information if your Google account gets locked.
To regain your Google account, you have to choose the recovery option. The Google account recovery option allows you to unlock your locked account even if you don’t remember the password. However, you must have other recovery information with you to recover your account successfully. Here’s how you can recover your Google account.
Recover the Google Account
While signing in to your Google account, if you type the wrong password multiple times, you will end up locking your account. Even if someone breaches into your account, you’ll have to follow the recovery method. So here’s the guide to do it.
- Open the Google Account Recovery Page on your preferred web browser. Make sure you remember your old password, email address, contact number, and recovery email.
- Type your registered phone number or email address of the Google account that you wish to recover.
- Press Next.
- Type the Google account password you remember.
- Press Next once you type the last remembered password.
- Now, if the password you typed doesn’t work, choose the Type another way option.
- Now you have to type the verification code that was delivered to your registered contact number.
- Type correct verification code in Enter the Code section.
- Press Next.
- If you have already given your recovery email on your Google account, type the recovery email address under Enter recovery email address box for verification.
- Press Send.
- Check the recovery email address account and check the verification code.
- Type the verification code box in the Type Verification Code box to recover your Google account.
Once you type the correct verification code that you received on your phone number or recovery email, you’ll be asked to set a new password for your Google account. From now, you’ll have to use your new password to sign in to your Google account.
To keep your Google account secure, you can rely on recovery email, contact number, and two-step verification method. As you can see, recovery email and contact number are crucial while recovering your locked account. But if you want to get an alert every time you or someone Sign In to your Google account, you should turn on the two-factor authentication. To turn on the Two-factor authentication feature, you’ll have to give your contact number to get the notification.
Conclusion
Today almost every social media platform and online accounts offer two-step authentication features to keep the account secure. It makes things difficult for strangers to access the account they don’t own. Google sends the login alerts on the email address and contact number to alert the owner.
Harry Williams is an inventive person who has been doing intensive research in particular topics and writing blogs and articles for Wire IT Solutions on Norton Products, Webroot Products, McAfee Products, Microsoft Office and many other related topics. He is a very knowledgeable person with lots of experience.To get in touch with the internet security service provider, just dial 8443130904.
SOURCE : Locked Google Account
The Best 3D Pens to Spend Your Money On

If you love modeling and designing, then you shall get a decent 3D pen. These pens will help you create 3D art and models, but how? Well, these pens contain extrude liquid plastic that instantly cools down and solidifies when you expose it in mid-air. When these 3D pencils came in the market for the first time, they were not so great but these days they have improved a lot and have become so advanced. You can use these 3D pens for a variety of other purposes as well, such as teaching children about 3D designs, creating 3D models, and more. In this article, we will introduce you to the best 3D pens that you can get right now. So without wasting much more time, let’s get started. Here we go!
MYNT3D 3D Pen Pro
MYNT3D Pro is a lightweight ergonomic stylus that is designed for all kinds of users. The pen has a lot of features, such as an adjustable feed to regulate the speed and flow of material, a clear OLED display to monitor and control temperature and other stuff, and the ability to work with a variety of filaments. This pen is even USB powered which means you can use it anywhere, even if you are traveling, you just need to hook this pen to a battery power bank and you are good to go.
SCRIB3D P1 3D Printing Pen
SCRIB3D P1 3D Printing Pen is a beginner-friendly 3D pen that has a very easy setup and intuitive controls. The pen has an auto-sleep function, so when you leave it inactive for two minutes, it will automatically turn off and go into sleep. Besides that, it features step-less speed adjustment tools and a feature to adjust the temperature so that you can lower down or increase the temperature of the pen-based on types of filaments. This pen has an LCD to monitor and control temperature and other stuff.
3Doodler Start
3Doodler Start is an outstanding 3D pen for kids. It does not have any screen and features only 3Doodler filaments. The pen is very easy to use, and the company makes it very secure so that kids won’t be hurt. Besides that, 3Doodler comes with a set of 48 strands in eight different colors. You can doodle up to 60 inches with each strand. Well, it might not be very useful to any professional, but it’s more than enough for kids.
3Doodler Create+
3Doodler Create+ is a very compact and effective 3D pen that offers a very clean design and easy-to-use controls. The pen even supports PLA and FLEXY plastics. It comes with a set of 75 filaments. There are a total of 70 different colored filaments to choose from. Besides that, the pen lets you control its speed and temperature so that you won’t face any problems while using it on different filaments. It overall works very well.
MYNT3D Super 3D Pen
MYNT3D Super 3D Pen is a pretty decent 3D pen that comes with a lot of basic features, such as a gearbox, replaceable nozzle, step-less speed slider, tools to control temperature, and ergonomic design. It boasts no OLED display and discrete temperature adjustment capability. It has a temperature adjustment screw but it only lets switch temperature for only PLA and ABS. This means you are limited only to these two materials. Additionally, the pen is clog-resistant and very durable too.
XYZprinting da Vinci 3D Pen
XYZprinting da Vinci 3D Pen is an excellent 3D wireless pen specifically designed for printing specialists. It supports only PLA filament and is powered through a USB cable. You get 11 different colored filaments and the pen is very easy to use. It works very nicely.
These are all the 3D pens that we recommend you purchase. They all work very nicely and great for 3D modeling. We would strongly recommend you consider the above-mentioned option for buying. That’s all for this article. I hope the information given above will be helpful to you. Thank you for reading the article. Have a great day!
Harry Williams is an inventive person who has been doing intensive research in particular topics and writing blogs and articles for Wire IT Solutions on Norton Products, Webroot Products, McAfee Products, Microsoft Office and many other related topics. He is a very knowledgeable person with lots of experience.To get in touch with the internet security service provider, just dial 8889967333.
SOURCE : 3D Pens
How To Set Up And Use The Microsoft Family Safety App
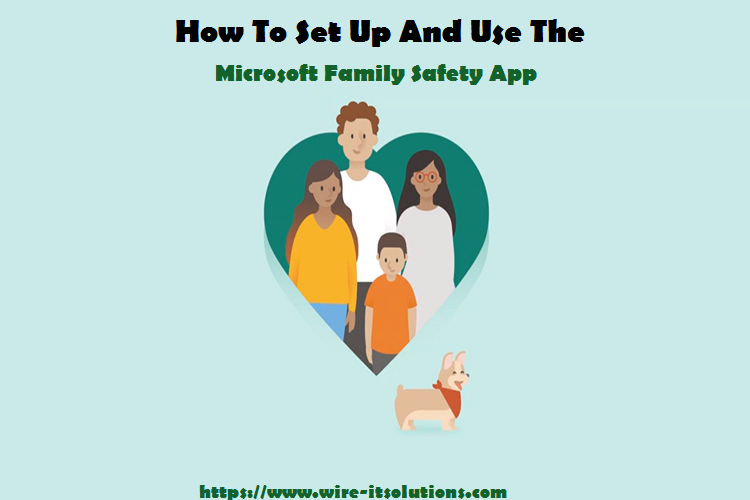
The Microsoft Family Safety app helps parents in monitoring their children’s and other family members’ involvement in digital activities and smart devices. If you are a parent, this app may be advantageous for you. This app provides many smart features, including filtering controls, location reporting, and app-usage recording, to help parents monitor their loved ones’ digital activities. If you want to create a digital safety shield around your family, you can quickly get started with the Microsoft Family Safety app using a Microsoft account and a smartphonelike Android or Apple.
Advantages of using the Microsoft Family Safety app
Microsoft has developed this app to track the usage of online services and tech devices of a family or an individual. If you are the head of the family, you can use this tool to monitor your family members’ screen time. If you find excess screen time of a family member, you can restrict it to a specific limit. You can block the apps or services if they are problematic for your kids or family members. You can use the filtration feature of this app to eliminate bad apps from the device. You can track the location of an individual if they go somewhere with a smart device.
Apart from all these advantages, there is a downside that you need to know. Any restrictions that you want to apply only works with other Microsoft or Windows products. For example, if you have to block or filter a website, you will need to browse through Microsoft Edge.
Ways to use the Microsoft Family Safety app
Before you start with Microsoft Family Safety, you should have a Microsoft Family Group. You will also have to equip your child’s device with Microsoft products like Microsoft Launcher and Edge. Make sure that your child is a part of the family group. After you are ready with these prerequisites, you can now start.
- Go to the Microsoft Family Safety page. Log in with your Microsoft account. Then click on Create a family group.
- If you are new to making a family group, you will be asked some questions, including your region, the number of children, and their ages. So, you have to answer all these questions.
- After logging in to the Microsoft account, you will see Add a member under the Family section. You have to select this option to add members to the group.
- Now you get the option to add a new member. If you want to add a spouse, hit the option called Organizer. In the case of a child, hit the option named Member. Fill in the details like email ID and Captcha code and click on Sendinvite.
- After adding the child account, you have to add an organizer. Use the option called Manage permissions located in the child’s account to add an organizer. You have to allow organizer permissions in every section.
- The child will receive an invite through email. So, your child will need to access that email to accept the invite by clicking on Join Now.
- After joining the group successfully, your child will have to install the Microsoft Launcher on their mobile device so the location can be tracked. Assist your child in allowing the Location setting for the Microsoft Launcher.
- Let the Microsoft Family Safety app sync with the necessary services.
Ways to monitor mobile usage using the Microsoft Family Safety app
After setting up the app successfully, here is how to monitor mobile device usage.
- Use the Activity tab to access every setting. This tab also allows you to enable and disable the monitoring. You can facilitate Activity reporting and Email weekly reports to me to get information about mobile usage.
- The screen time tab is available to control the device’s usage on a particular time and day for your child.
- You can block the child from accessing specific apps or services or set a time limit through App and game limits.
- Use Content restrictions to limit the usage of online content or apps.
- The Spending page is designed to ask permission if your child wants to purchase a service or app from the Microsoft Store.
- You can use Find your child to track your child’s location.
Harry Williams is an inventive person who has been doing intensive research in particular topics and writing blogs and articles for Wire IT Solutions on Norton Products, Webroot Products, McAfee Products, Microsoft Office and many other related topics. He is a very knowledgeable person with lots of experience.To get in touch with the internet security service provider, just dial 844-313-0904.
SOURCE : Microsoft Family Safety
How to Adjust Keyboard Brightness in M1 MacBook
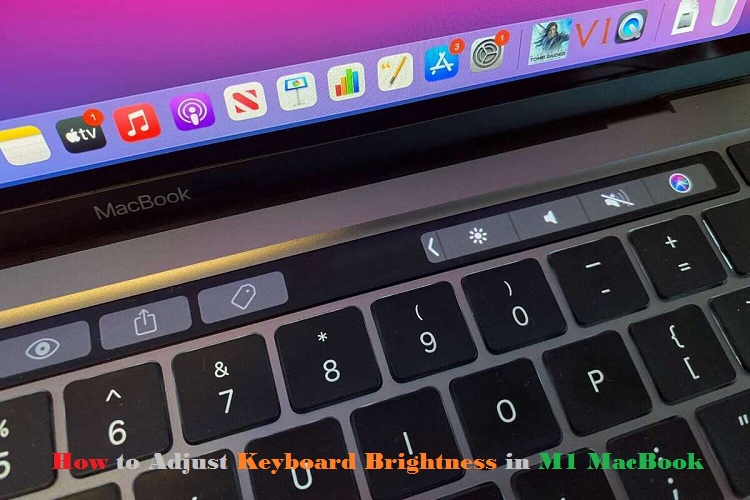
In this article, we have discussed the ways using which you can adjust the keyboard brightness in M1 MacBook. Recently Apple has announced MacBook Pror with Apple M1 chips, and it seems like everyone is loving the new processor and the capabilities it offers. Even though you will see similar specs on the new MacBooks, in terms of design, Apple has; however done a significant change. The shortcut keys for keyboard brightness adjustments have now been replaced with shortcuts for Dictation, DND, and Spotlight. So, if you are among the users who arethinking about how they can change the backlight brightness of their keyboard, you can follow the steps mentioned, which we have discussed below.With that said, let’s proceed further to how to adjust keyboard brightness in the latest M1 MacBook Pro and MacBook Air.
Change Keyboard Brightness in M1 MacBook Air and Pro
Apple has completely removed the shortcut keys, yet, there are several ways using which you can make adjustments in the brightness of your M1 MacBook’s keyboard. This articlediscusses all the possible ways to make changes to the keyboard illumination and to turn on/off, MacBook Air M1’s keyboard light. You can also find the steps to get back those shortcut keys on your M1 Mac. With all that said, let’s get started with the methods:
Adjust Keyboard Brightness with Control Center
This is the easiest way with which you can change the backlight of your Mac’s keyboard. To change the keyboard backlight of your Mac using the Control Center in macOS Big Sur, you need to follow the steps mentioned below:
- Open the Control Center by clicking on its icon appearing in the menu bar.
- Further, press the option“Keyboard Brightness.”
- Now, you need to the slide bar formaking adjustments in the keyboard brightness of your M1 MacBook Pro/Air.
Add Keyboard Brightness Setting to Menu Bar
If adjusting the brightness of your Mac’s keyboard is the prime requirement of every day, then you follow the alternate method. Rather than adjusting it using the Control Center, users can add the brightness menu on the menu bar of their Mac.
You need to follow the steps mentioned below:
- First, tap on the icon of the Control Center icon appearing in the menu bar.
- Now, drag and drop the option “Keyboard Brightness” to the menu bar.
- Alternatively, users can head over to “System Preferences,” then click on Dock and Menu Bar and further on the “Keyboard Brightness,” Now, they need to checkmark the box appearing next to option “Show in Menu Bar.”
Now, whenever you want to change the keyboard brightness, you can do it by clicking on this icon rather than heading towards the Control Center.
Get Keyboard Brightness Shortcut Keys Back on M1 MacBook
You can also use the keyboard shortcut keys for adjusting the brightness of your Mac. This would, however, need some amount of work to be done. And below, we have mentioned what exactly you need to do:
- First, you need to install “Karabiner Elements” on your MacBook. Once installed, run it.
- You might be shown an error stating that“System Extension Blocked.”Now tap on the option“Open Security Preferences.”
- Further, press the lock icon and use your Touch ID or type your password to unlock.
- Then, press“Allow.”
- Now you need to launch the Karabiner Elements app and further press the button related to “Open Security and Privacy System Preferences”appearing in the pop-up that appearson the screen of your M1 Mac.
- Further, enable the options“karabiner_observer” and “karabiner_grabber.”
- Close Karabiner Elements and then re-launch it. Now tap on the option “Function Keys” appearing in the navigation bar at the top. It would have changed F5 and F6 to decreasing and increasing illumination of the keyboard.
Post following the steps, you can use the keys F5 and F6 in order to adjust the brightness of your M1 MacBook’s keyboard. Karabiner also modifies the F4 key to “Launchpad.” However, if and only if you want to keep it for the Spotlight, customizations can be done accordingly from the Karabiner Elements app. The Karabiner Elements app can be used to remap the Mac keyboard in any way required.
Disable Auto-Brightness for Keyboard Backlight
The Macs are set in a way that they automatically adjust the keyboard brightness whenever they come across low light situations. It pretty good in terms of battery efficiency; however, if you do not want it to happen automatically, follow the steps that we have mentioned below to disable it.
- You need to head over to the System Preferences and then click on Keyboard.
- Now uncheck the box stating, “Adjust keyboard brightness in low light.”That’s all you have to do.
Once you are done with the steps, the keyboard brightness will not be adjusted automatically.
So, these were the methods using which you can easily adjust the brightness of your M1 Mac’s keyboard. The individuals can use either of the above-mentioned methods. In our opinion adjusting keyboard brightness by going to the Control Center would work totally well. However, if you want to dig deeper into adjusting keyboard brightness using Karabiner Elements, you can do so. So, which methods would you prefer? Are you comfortable using the new method foradjusting the keyboard brightness on your Mac? Or would you prefer using the dedicated shortcut keys? Do let us know in the comment section below.
Harry Williams is an inventive person who has been doing intensive research in particular topics and writing blogs and articles for Wire IT Solutions on Norton, Webroot, McAfee, Microsoft Office and many other related topics. He is a very knowledgeable person with lots of experience.To get in touch with the internet security service provider, just dial 8889967333.